
20-year old Saturated West Town Masonry Building Dripping Efflorescence - Evaluation & Repair Recommendations prepared May 2026
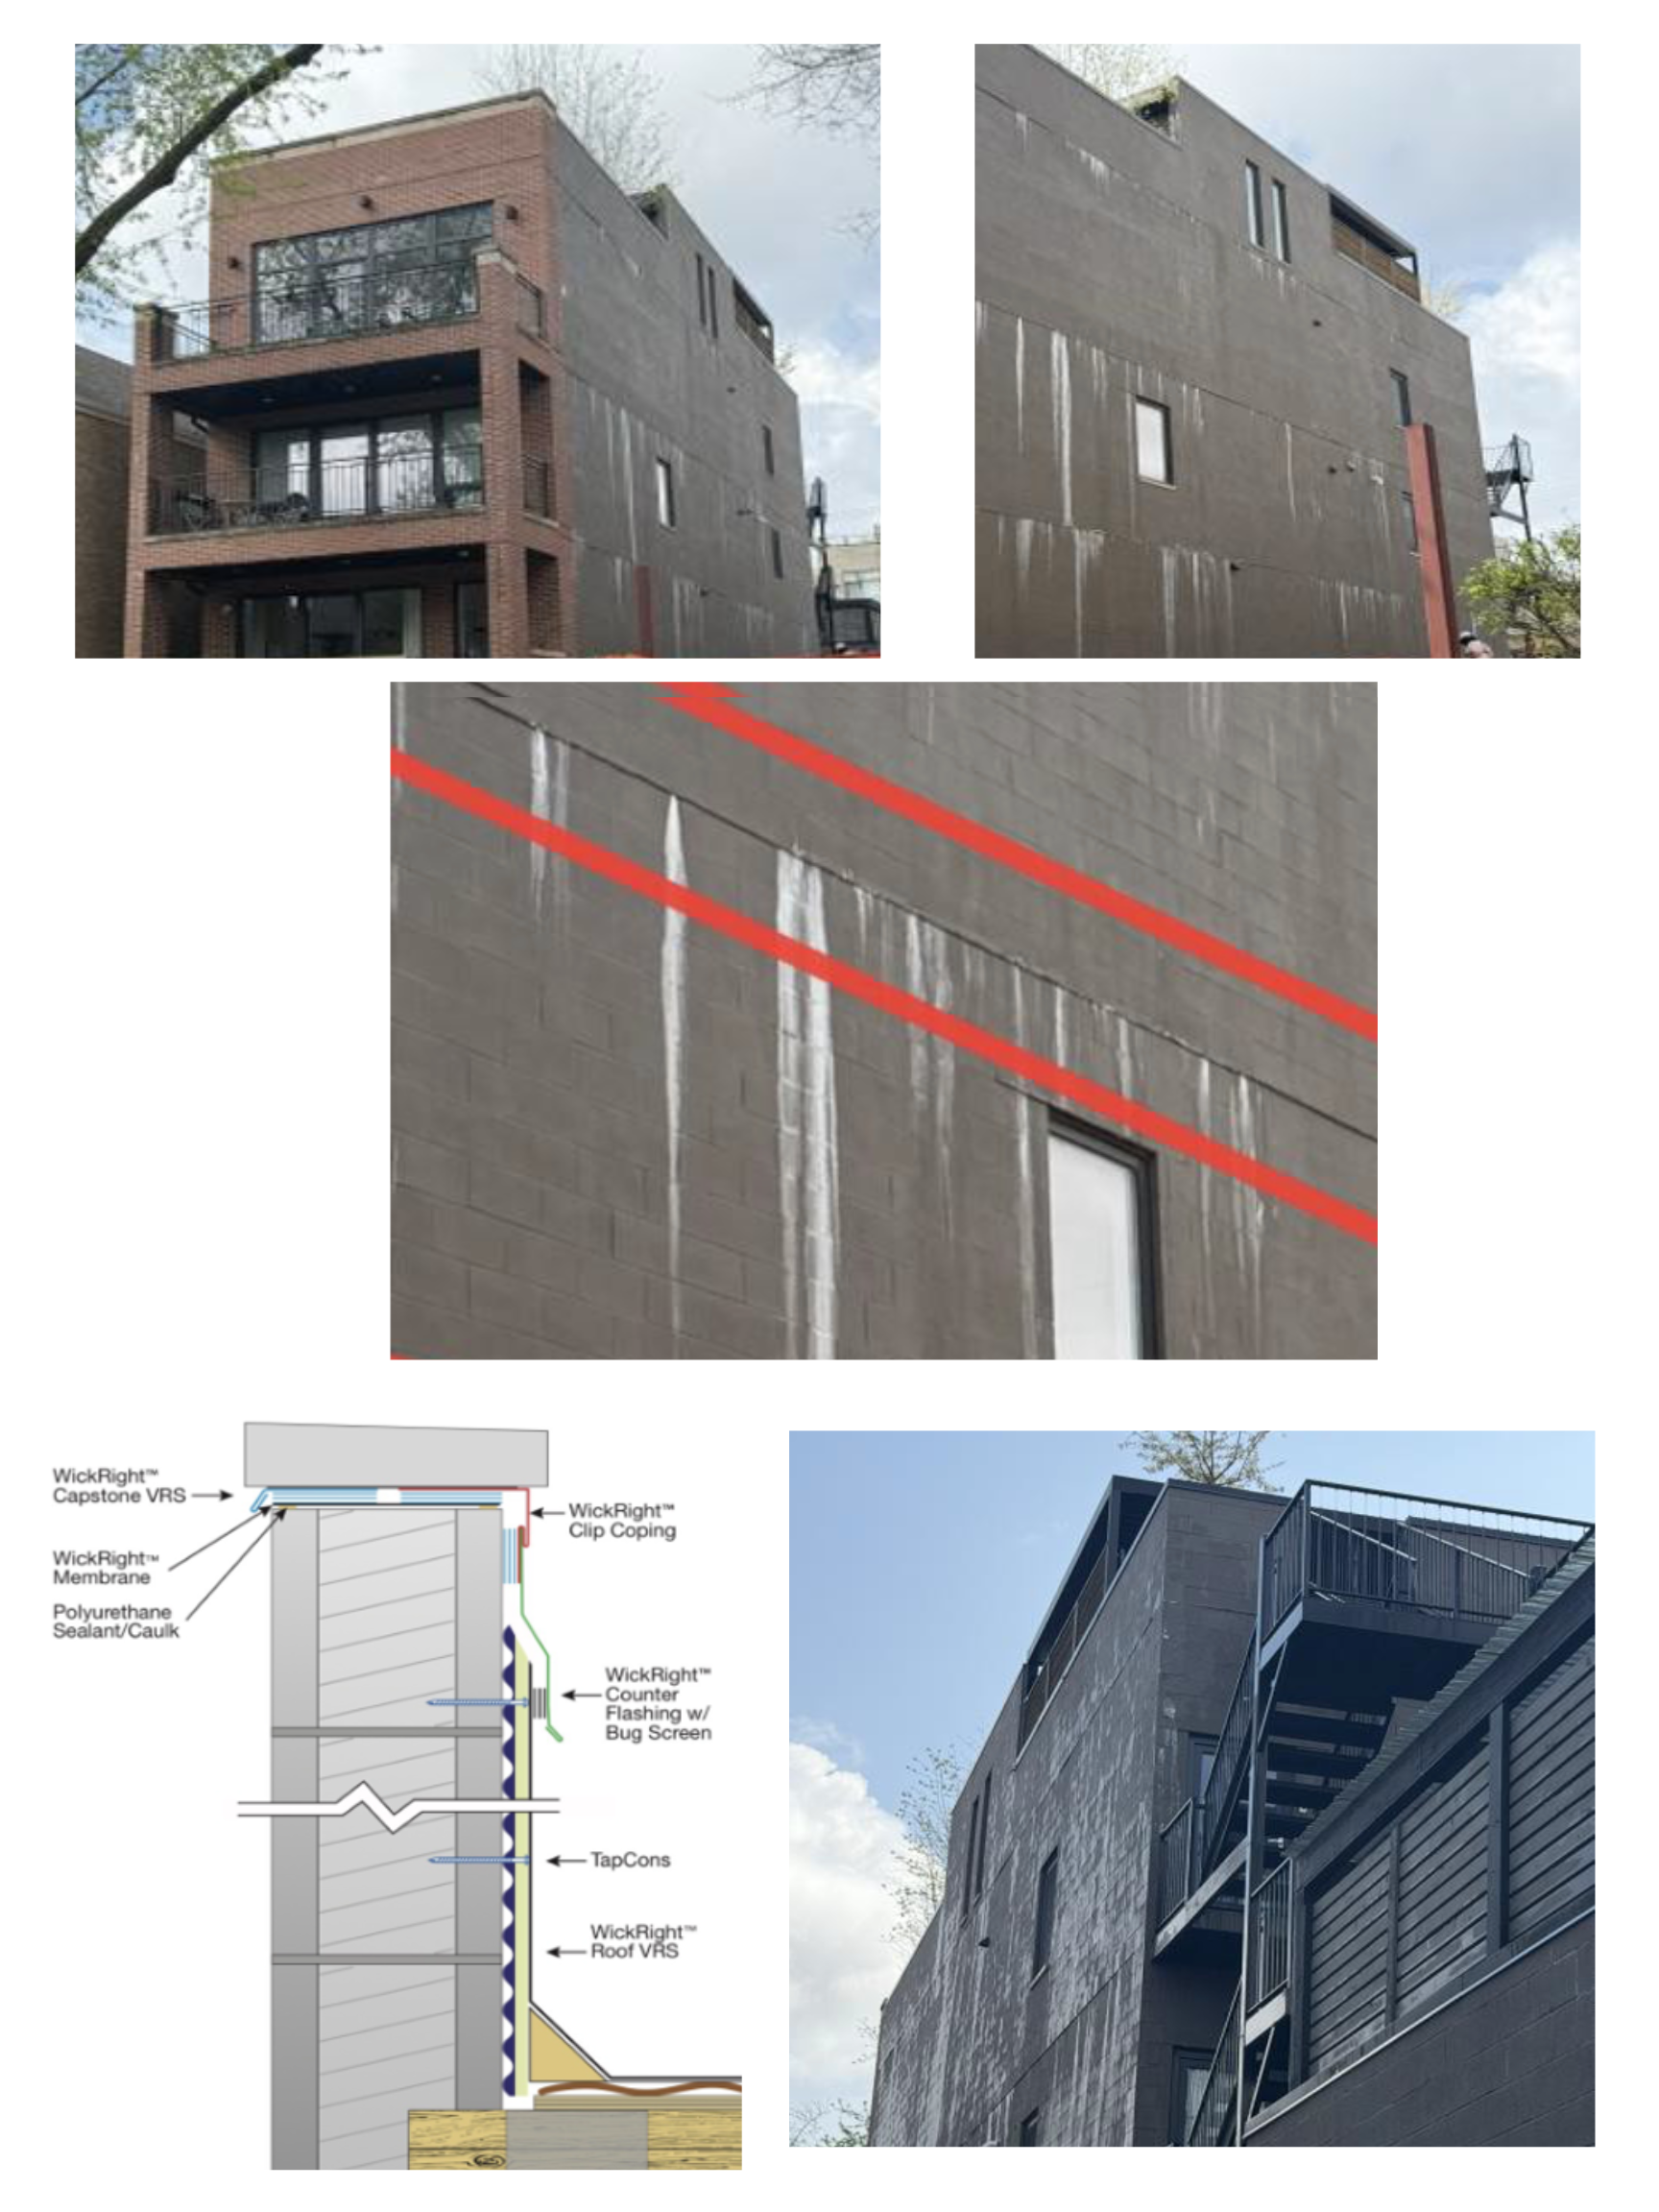
Evaluation by Wet Building Solutions written by Bob Kelly, May 2026
Subject Property:
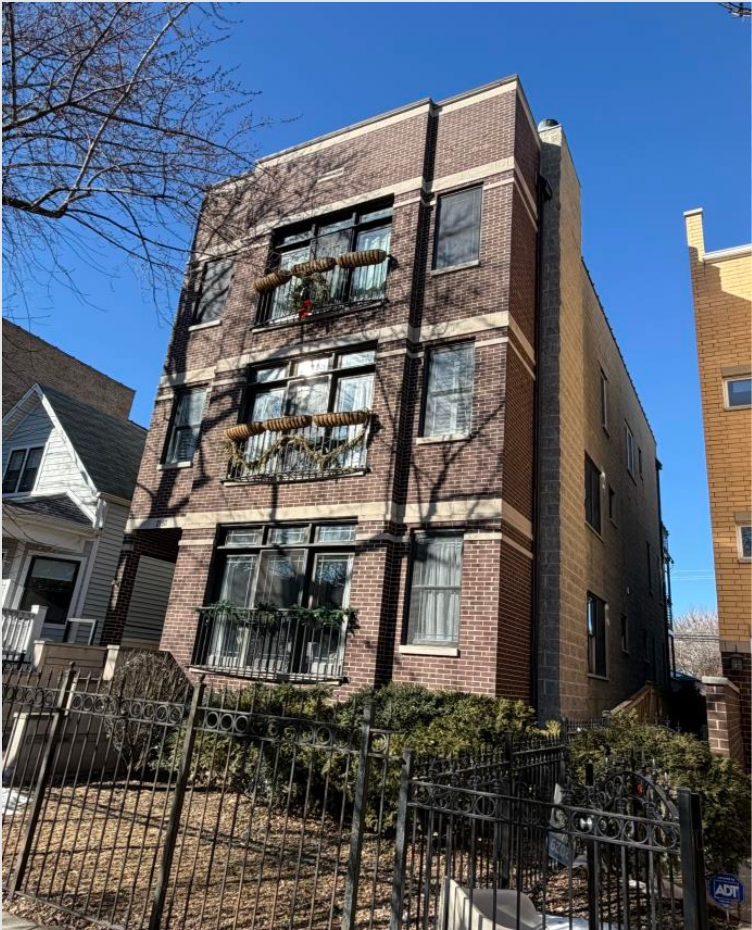
Circa 2005-ish building with CMU on 3 sides of the building and brick front elevation. Side and rear elevations are showing signs of severe efflorescence. Minerals are flowing out of the masonry at each level of the structure, indicating trapped moisture in the CMU. The concern here is air quality, as well as preserving the wooden interior framing and trusses. The building is unhealthy and must dry.
The building is retaining a large amount of water. To restore the health of the building, we must get airflow under the plywood sheathing at the truss ends. To dry it out, we will uncover all areas that have any connection to upward vapor movement and install an engineered pathway to release the moisture vapor.
Venting is needed at every floor level, the top of the parapets and the perimeter of the roof system. We also need to prevent water from entering at every horizontal surface, for example, parapet capstones, door sills and windowsills.
Investigation:
We need to investigate the condition of the roof system.
- Remove 1-2 sections of recreational decking along both sides of the roof at the perimeter where the trusses are embedded in the masonry walls
- Locate trusses and drill 4-5 small holes, one into each truss, and insert a moisture meter to document the condition of the trusses.
- Seal the roof appropriately.
Roof Venting:
- Cut back 6 feet of existing recreational roof decking to access the roof membrane.
- Remove 3 feet roof membrane and sheathing.
- Remove 1 foot of foam insulation along the perimeter of the roof. Foam insulation will be replaced with Rockwool insulation. Insert dimple board along perimeter of wall to separate new insulation from the masonry.
- Remove mortar from both sides of each truss end. Water saturates the masonry, which guarantees contact with moisture to the wood.
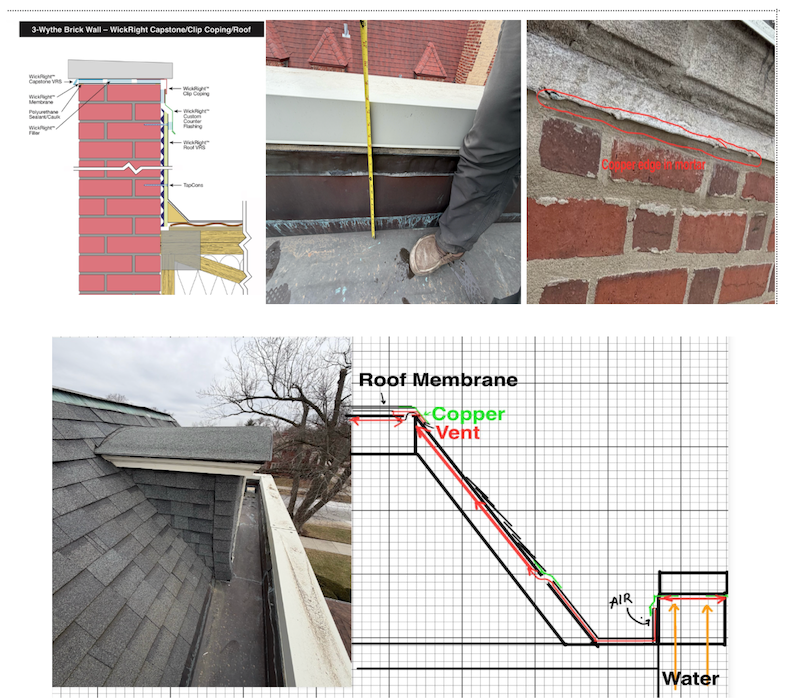
- Install WickRight Roof Vent flat onto the trusses AND vertically on the parapet wall.
- Install new roof membrane and WickRight 3-piece vented counter flashing over the roof vent.
Please note: Owners must remove the mature plants. It’s too much weight for the roof framing. Wet Building Solutions and our subcontractors are not responsible for moving plants, furniture, and personal possessions from the roof prior to the start of work. If crews need to move anything from the roof on the first scheduled day of work, the HOA will be charged an additional $135 per hour per crew member performing this task.
Parapet Venting: The engine that creates suction for venting the roof
Front elevation capstone flashing:
- Remove capstones
- Install WickRight vapor permeable membrane and WickRight vented flashings between the top of the wall and bottom of the capstones
- Re-install capstones
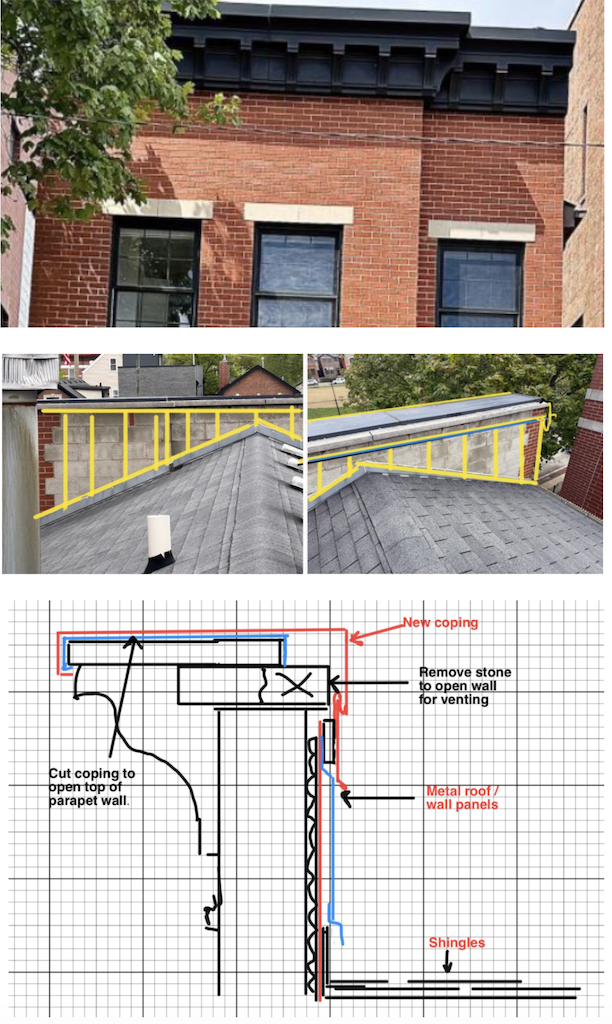
Vent top of side elevation parapet walls:
- Remove metal coping.
- Install WickRight metal coping vent and new copings with proper leg length (5” minimum) to prevent wind-driven rain from entering the wall.
Masonry sealants: Minimize the amount of rain absorption via the walls
Seal Front Elevation with ChemTrete PB-100
Seal the Side and Rear Elevations with Elastomeric paint
The structure is taking on moisture and cannot dry out. The formula for creating a dry building is to minimize the bulk water getting in and maximize the moisture getting out. The photo below shows how moisture can penetrate through pinholes in the elastomeric finish. The efflorescence is due to water becoming trapped, pooling at the bottom of the through-wall flashings at each floor and the roof level and carrying minerals out leaving deposit stains behind. It was helpful to get pictures of the building while it was wet on the exterior. You can see areas of saturated CMU below.
We recommend applying 2 coats new elastomeric paint. We will help your get multiple sealant application bids from quality installers.
Custom Venting Plan for North and South Elevations:
The foam insulation on the interior of the building, has forced us to find an alternative way to release the trapped water. The building needs airflow and vapor release to help slow any potential rot in the end grain of the wood trusses. We recommend the following:
- Determine the layout of all the floor and roof truss ends.
- Drill holes through the CMU at the top and bottom of each floor level in line with the trusses.
- Drill vent holes to dry approximately 300 truss ends embedded in the walls on both sides of the building.
This repair should be performed while scaffolding is in place for masonry sealing to maximize the use of the access.
Additional recommended repairs:
Re-design and re-install recreational roof decking:
Rebuild and install 6’ of removed recreational decking into 3’x6’ sections for easy maintenance.
3rd floor door sill flashing for front and rear elevations on each deck
- Remove limestone sills
- Remove 2 decking boards
- Install sill flashing which will also be used to flash the rim joist of the deck
- Reinstall stone and decking boards